Nothing could be faster, easier, or more delicious than kebabs on the grill. After the minimal prep work is done, Veggie Kebabs is on the table in only 6 minutes!! You can change them up however you would like — use different veggies, add chunks of steak or chicken, change the herbs, etc. For an easy family meal, a great party appetizer, or even a quick hearty lunch, these kebabs use the best of what summer has to offer.

Veggie Kebabs
Ingredients
Equipment
Method
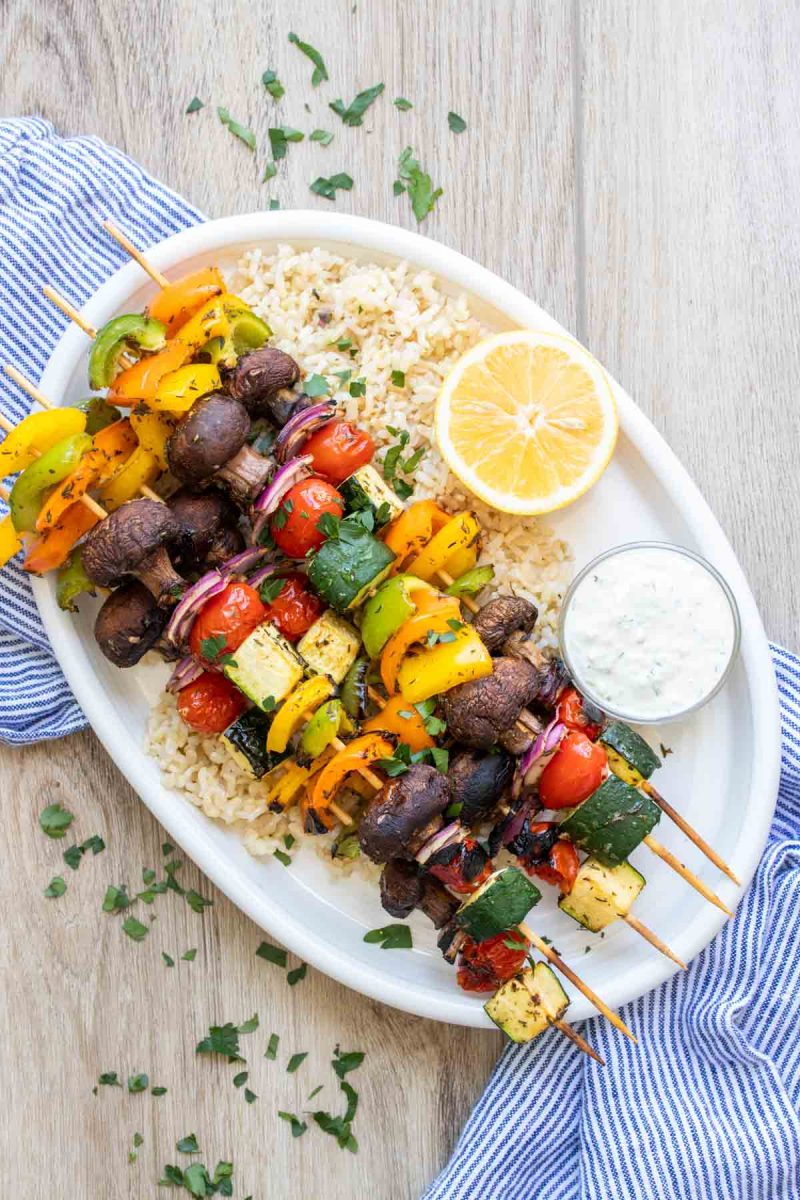
- Assemble the kebabs by alternating a chunk of squash (zucchini), a chunk of onion, pepper, mushroom, bread (if using), until you have 2 of each veggie on the skewer, then stick a whole cherry tomato on each end to hold everything on.
- Brush the vegetables with olive oil, and season each kebab with a sprinkle of minced garlic, rosemary, salt and pepper. Grill until the vegetables are tender (and the bread is toasted), about 6 minutes (making sure to turn them once or twice while they cook.)
Video
Notes
Alternative Method: Oven-Roasted

If you don’t have access to a grill or prefer an alternative cooking method, fear not! You can still enjoy the tantalizing flavors of Veggie Kebabs by preparing them in the oven. Here’s a simple method to achieve delicious oven-roasted kebabs:
- Preheat your oven: Start by preheating your oven to 425°F (220°C) and adjust the rack to the middle position.
- Prepare the vegetables: Cut your chosen vegetables into bite-sized pieces, ensuring they are uniform in size for even cooking. Popular choices include bell peppers, zucchini, mushrooms, cherry tomatoes, and red onions.
- Toss with marinade: In a large bowl, toss the vegetables with your desired marinade. A mixture of olive oil, herbs, spices, and a splash of lemon juice or vinegar works beautifully. Ensure all the veggies are coated evenly.
- Thread the vegetables: Take a baking sheet and line it with parchment paper. Thread the marinated vegetables onto metal skewers or wooden skewers that have been soaked in water for about 30 minutes to prevent them from burning.
- Place on baking sheet: Arrange the skewered vegetables on the prepared baking sheet, leaving a little space between each kebab. This allows the hot air to circulate and ensures even roasting.
- Roast in the oven: Place the baking sheet in the preheated oven and let the kebabs roast for approximately 20-25 minutes, or until the vegetables are tender and slightly charred, turning them halfway through the cooking process for even browning.
- Serve and enjoy: Once the kebabs are beautifully roasted, remove them from the oven and let them cool for a few minutes. Carefully slide the vegetables off the skewers onto a serving platter, and garnish with fresh herbs, toasted sesame seeds, or crumbled feta cheese for an extra touch of flavor and texture.
With this oven-roasted method, you can still achieve that delightful smoky flavor and tender-crisp texture, making your Veggie Kebabs a hit even without a grill. Enjoy this alternative cooking technique and savor every delicious bite!
Note: It’s important to keep a close eye on the kebabs while roasting in the oven to prevent them from overcooking or burning. Cooking times may vary slightly depending on your oven, so adjust accordingly.
Cooking Tips

Mastering the art of preparing Veggie Kebabs requires a blend of technique, creativity, and a sprinkle of culinary magic. In this section, I’ll share valuable tips and tricks to help you achieve the best results with your kebabs. Additionally, I’ll shed light on common mistakes to avoid, ensuring that your grilling experience is nothing short of perfection.
- Marinade Magic:
To infuse your veggies with incredible flavor, don’t skip the marinade step. Create a tantalizing mixture of olive oil, herbs, spices, and a touch of acidity, like lemon juice or vinegar. Allow the kebabs to marinate for at least 30 minutes, or even overnight, to enhance their taste. - Perfectly Prepped Veggies:
Ensure uniform cooking by cutting your vegetables into similar sizes. This will guarantee that each piece cooks evenly and achieves that desirable tender-crisp texture. Aim for bite-sized chunks, approximately 1-2 inches in diameter, for optimal grilling results. - Mindful Skewering:
When threading your veggies onto skewers, pay attention to the order and spacing. Alternate different colors and textures to create visually appealing kebabs. Leave a small gap between each ingredient to allow heat and smoke to circulate evenly.
The Best Ways To Serve And Enjoy Veggie Kebabs
:max_bytes(150000):strip_icc()/grilled-vegetable-kebabs-336561-hero-01-2f2e8ea3bd0e456c85d143fc6b444b6a.jpg)
The art of serving Veggie Kebabs is not just about the flavor; it’s also about creating an exquisite dining experience. In this section, I’ll guide you through recommendations for sides, garnishes, and beverages that perfectly complement the flavors of your kebabs. I’ll also suggest different ways to present this dish, transforming it into a visual masterpiece on your plate.
- Flavorful Companions:
Pair your Veggie Kebabs with a refreshing side salad tossed in a tangy vinaigrette. The crispness of mixed greens, the sweetness of cherry tomatoes, and the crunch of cucumbers will elevate your meal. Alternatively, serve the kebabs alongside a fluffy bed of couscous or quinoa for a hearty and nutritious pairing. - Garnish with Elegance:
Add an extra touch of sophistication by garnishing your kebabs with fresh herbs like cilantro, mint, or basil. These fragrant greens will enhance the flavors and add a vibrant pop of color to your plate. Sprinkle some toasted sesame seeds or crumbled feta cheese for an extra layer of texture and richness. - Creative Presentations:
Experiment with different ways to serve your Veggie Kebabs. Arrange them on a platter in a circular pattern, creating an inviting centerpiece for your table. Alternatively, slide the grilled vegetables off the skewers and serve them in warm pita bread pockets with a dollop of creamy tzatziki sauce. The options are endless, so let your creativity shine!
FAQs

As you embark on your Veggie Kebabs journey, it’s natural to have questions along the way. In this section, I provide answers to some frequently asked questions to help you navigate any uncertainties. From ingredient substitutions to storage guidelines, I’ve got you covered. Let’s dive into the most common queries and make your kebab experience even more enjoyable.
Can I substitute certain vegetables in the recipe?
Absolutely! Feel free to customize your Veggie Kebabs by using your favorite vegetables or what’s in season. Bell peppers, zucchini, mushrooms, cherry tomatoes, and red onions are popular choices, but don’t hesitate to experiment with other options that suit your taste.
How long can I store leftovers, and how should I store them?
If you have any leftovers, store them in an airtight container in the refrigerator for up to 3 days. To reheat, simply place the kebabs in a preheated oven or grill for a few minutes until warmed through. However, keep in mind that freshly grilled kebabs are always the most delicious!
Can I make Veggie Kebabs ahead of time?
Certainly! You can prepare the kebabs a few hours in advance and keep them refrigerated until you’re ready to grill. Just make sure to keep the skewers covered with plastic wrap or foil to prevent them from drying out.
What other sauces or dips can I serve with Veggie Kebabs?
A refreshing tzatziki sauce made with yogurt, cucumber, garlic, and herbs is a classic choice. You can also try a tangy chimichurri sauce or a spicy harissa dip for an extra kick. Experiment with different flavors to find your perfect match!
Can I cook Veggie Kebabs without a grill?
Absolutely! If you don’t have access to a grill, you can still enjoy delicious Veggie Kebabs by using a stovetop grill pan or even the broiler in your oven. Simply adjust the cooking time and temperature accordingly to achieve that desired char and tenderness.
From essential cooking tips to creative serving suggestions, this blog post is your ultimate resource for preparing mouthwatering Veggie Kebabs. Learn how to avoid common mistakes, explore flavorful side dishes, and find answers to frequently asked questions. Join the community by sharing the recipe and subscribing to stay updated with the latest culinary delights.